Documenting API through Swagger

Hello Friends,
I was working on documenting my APIs when I came across Swagger and the ease and with the minimum configuration it takes to set up documentation of APIs blew my mind.

It has very few prerequisites, which I was able to do in one sitting. Here are few pointers from my side for the configuration of documentation of your APIs.
The initial configuration is pretty simple, which you can get from a simple google search. I will reiterate the same.

First you need to create a Docket Bean

 @Bean
 public Docket api() {
 return new Docket(DocumentationType.SWAGGER_2).select() 
 .apis(RequestHandlerSelectors 
 .basePackage("Name of the base package")) 
 .paths(PathSelectors.regex("/.*"))
            .build(); 
}  

For the UI portion, you need to add the below code:

public void addResourceHandlers(final ResourceHandlerRegistry registry)
{
registry.addResourceHandler("swagger-ui.html")

.addResourceLocations("classpath:/META-INF/resources/"); registry.addResourceHandler("/webjars/**")
.addResourceLocations("classpath:/META-INF/resources/webjars/");
}

I faced a few problems which I will list down below:

1. Some of my methods in my controller weren’t showing up.

Solution: So, I realized that in the controller methods where I was using @PathVariable annotation, the method was not showing up in the Swagger documenation. The reason for that was I using the Spring version 4.3.1. In their documentation I found that the support for controller method having @PathVariable came in the Spring Boot version 4.3.3. Also, Swagger version 3 will also have this curbed. So, as of now, just upgrade the version of Spring and you should not be having those issues.

2. Using different controllers for different business functions

Okay, this one is not an issue, but an advice to make the documentation better. Swagger will list out all the controllers along with their methods separately. So, make different controllers and annotate them with @RestController and Swagger will show them separately. Also, you can use the below annotations to further give more details about the services.

@Api
– This annotation helps you provide detail of the controller. You can describe what all functionalities are offered inside this controller.
Eg:

@Api(value="My Controller", description="Operations pertaining to my first controller")

@ApiOperation
– This annotation helps you describe the methods and the response type
Eg:

@ApiOperation(value = "The method lists the users", response = List.class)

@ApiModel
– This annotation helps you describe the model
Eg:

@ApiModel(description = "User Model")

3. Changing the defaults on the UI Page

The default values on the UI page are also pretty apt. But if you want to customize those, the below options can help you do that.

private ApiInfo apiEndPointsInfo() {
        return new ApiInfoBuilder().title("Your customized title")
        .description("The description")
        .contact(new Contact("Sunny Jaiswal", "www.xyz.com", "sampleemailid@gmail.com"))
            .license("Apache 2.0")
            .licenseUrl("http://www.apache.org/licenses/LICENSE-2.0.html")
            .version("1.0.0")
            .build();
    }                

Once the above function is built, you can attach this function to the Docket API you built.

 
 @Bean
 public Docket api() {
 return new Docket(DocumentationType.SWAGGER_2).select() 
 .apis(RequestHandlerSelectors 
 .basePackage("Name of the base package")) 
 .paths(PathSelectors.regex("/.*"))
            .build().apiInfo(apiEndPointsInfo()); 
}           

So, you just add the highlighted portion and you are done with customizing the details on the UI page as per your need.

4. Configuring More

I needed to change the base URL as well as the api-doc URL to suit my needs, since I was going to host the APIs on one of my domains and user forwarding with masking. So, it was important for me that the URL that I am going to show in the UI page are masked.
Also, since I was using forwarding with masking, which essentially shows the services page in an iframe, I was having issues in showing up the page. The reason being that by default, the services of Spring deny to show the page in an iframe. It is governed by a header in the Response called X-Frame-Options which is by default in Deny state. So, for me to use the services from my own domain, I had to allow my domain in the response header. To do that, you need to set the below options in the SecurityConfiguration class:

http.headers().frameOptions().disable()
.addHeaderWriter(new StaticHeadersWriter("X-FRAME-OPTIONS", "ALLOW-FROM http://www.xyz.com"))

Make sure to append the above options overrided configure method.

I found the solution for changing the base URL using the following options. So, here is the Docket bean with the new host that I wanted to use.

@Bean
public Docket api() {
return new Docket(DocumentationType.SWAGGER_2)
.host("http://www.xyz.com")
.select() .apis(RequestHandlerSelectors.basePackage("Name of base package"))
.paths(PathSelectors.any())
.build().apiInfo(apiEndPointsInfo());
}


I am still looking for a way to change the api-doc URL. I will update the article when I am able to do it.

References:

Creating your own REST WebServices secured with OAuth2.0 – Part 2(Practical)

Hello Friends,

Today lets make the real thing, a REST API secured using OAuth2.0. As a first step, we would convert our normal dynamic web project into a Maven project. This will help us follow best practices more efficiently as you will see in later posts.
So, lets carry on where we left in previous articles.
We had created a project called ‘SampleRESTAPI’. Either you can convert the project into a Maven one or create a new copy. We would keep our previous project safe and create a copy which will then convert into a Maven project. I have named my new project ‘SampleRESTAPISecured’.
After copying from an existing project, the first thing you should do is go into the properties of the new project and change the context that this project will be published on.

Confirm the steps and your dynamic project is ready. Now lets convert it into a Maven project. For that, right click on the project and under Configure, you will get ‘Convert into Maven’. Click on it and you will get the below screen:

After clicking Finish, your project is now a Maven handled project. Next step is to add necessary dependencies into the pom.xml file.

<properties>
	<project.build.sourceEncoding>UTF-8</project.build.sourceEncoding>		 
    <springframework.version>4.3.3.RELEASE</springframework.version>		 
    <springsecurity.version>4.1.1.RELEASE</springsecurity.version>		 
 <springsecurityoauth2.version>2.0.10.RELEASE</springsecurityoauth2.version>
	<jackson.library>2.7.5</jackson.library>
	<gson.version>2.7</gson.version>
</properties>  

<dependencies>
    <!-- Spring -->
    <dependency>
        <groupId>org.springframework</groupId>
        <artifactId>spring-core</artifactId>
        <version>${springframework.version}</version>
    </dependency>
    <dependency>
        <groupId>org.springframework</groupId>
        <artifactId>spring-web</artifactId>
        <version>${springframework.version}</version>
    </dependency>
    <dependency>
        <groupId>org.springframework</groupId>
        <artifactId>spring-webmvc</artifactId>
        <version>${springframework.version}</version>
    </dependency>

    <!-- Spring Security -->
    <dependency>
        <groupId>org.springframework.security</groupId>
        <artifactId>spring-security-web</artifactId>
        <version>${springsecurity.version}</version>
    </dependency>
    <dependency>
        <groupId>org.springframework.security</groupId>
        <artifactId>spring-security-config</artifactId>
        <version>${springsecurity.version}</version>
    </dependency>

    <!-- Spring Security OAuth2-->
    <dependency>
        <groupId>org.springframework.security.oauth</groupId>
        <artifactId>spring-security-oauth2</artifactId>
        <version>${springsecurityoauth2.version}</version>
    </dependency>

    <!-- Jackson libraries -->
    <dependency>
        <groupId>com.fasterxml.jackson.core</groupId>
        <artifactId>jackson-databind</artifactId>
        <version>${jackson.library}</version>
    </dependency>
    <dependency>
        <groupId>com.fasterxml.jackson.dataformat</groupId>
        <artifactId>jackson-dataformat-xml</artifactId>
        <version>${jackson.library}</version>
    </dependency>

    <dependency>
        <groupId>javax.servlet</groupId>
        <artifactId>javax.servlet-api</artifactId>
        <version>3.1.0</version>
        <scope>provided</scope>
    </dependency>
    <dependency>
        <groupId>com.google.code.gson</groupId>
        <artifactId>gson</artifactId>
        <version>${gson.version}</version>
    </dependency>
</dependencies>

The properties define the Spring and other related versions and the dependencies define all the files that Maven will download to compile the project.

With this setup, you are ready to run the project. The quotes can be retrieved by hitting the GET method on http://localhost:8080/SampleRESTAPISecured/backend/quotes

Before getting into the juicy part, I would like to make one change in the package name. We can do it by right-clicking on the package, Refactor and then rename.
The project structure would look like this:

Now that our project is ready, we will start plugging in the OAuth security. We would add three more package here in the project, namely:
com.service.configuration: Will contain files for basically starting the execution.
com.service.controller: Will contain all the controllers.
com.service.security : Will contain the files related to OAuth2.0
This is how our final project structure would look like:

I will explain the major files here, but you can download the source code from my Github.

So the main file, or the point of starting would be the SecureAPIConfiguration.java file. Here we define it as a starting point by annotating it with @EnableWebMvc and @Configuration.

This is how the file looks:

@Configuration
 @EnableWebMvc
 @ComponentScan(basePackages = "com.service")
 public class SecureAPIConfiguration extends WebMvcConfigurerAdapter{
}

Next we add the controller:

@RestController
@RequestMapping(value = "/quotes")
public class QuotesController {

@Autowired
QuoteService quoteService;

@RequestMapping(value = "/getquotes", method = RequestMethod.GET)
public List<Quotes> getAllQuotes() {
    return quoteService.getAllQuotesServiceMethod();
    }
}

Now in the security package, there would be three files that needs our attention.
AuthorizationServerConfiguration: Here we configure the credentials for the authorization server.
OAuth2SecurityConfiguration: Here you can define the roles and resource owner credentials.
ResourceServerConfiguration: Here you can define which roles have access to which endpoints and various different functionalities as well. We can also exclude some endpoints here to be out of scope of OAuth security.

After configuring these as per your requirements, you are setup. Although just make sure you define the annotations @Component and @Service in the QuoteService class, other wise you would be getting the below exceptions:

Caused by: org.springframework.beans.factory.NoSuchBeanDefinitionException: No qualifying bean found for dependency [com.service.Service.QuoteService]: expected at least 1 bean which qualifies as autowire candidate. Dependency annotations: {@org.springframework.beans.factory.annotation.Autowired(required=true)}
     at org.springframework.beans.factory.support.DefaultListableBeanFactory.raiseNoMatchingBeanFound(DefaultListableBeanFactory.java:1463)
     at org.springframework.beans.factory.support.DefaultListableBeanFactory.doResolveDependency(DefaultListableBeanFactory.java:1094)
     at org.springframework.beans.factory.support.DefaultListableBeanFactory.resolveDependency(DefaultListableBeanFactory.java:1056)
     at org.springframework.beans.factory.annotation.AutowiredAnnotationBeanPostProcessor$AutowiredFieldElement.inject(AutowiredAnnotationBeanPostProcessor.java:566)
     … 24 more

Now lets test the API in the POSTMAN app:

The repo can be found at this link.

In the next part, we will self document our API using a tool called Swagger. And click here for the previous post in the series.

Creating your own REST WebServices secured with OAuth2.0 – Part 1(Concept)

Hello fellow coders,

So, I had been working on creating a Web services through REST. After troubleshooting for different issues that cropped up throughout the week, I finally have it created.

So I thought I will share my experiences so that it can help some other person as well. Lets start with the theory.

We will start with the four roles that is defined in OAuth2.0

  1. Resource Owner: This is basically the owner of the resource that is being protected by OAuth2.0
  2. Resource Server: This refers to the server which is hosting the protected resources. They would provide the protected resources in exchange for the access token.
  3. Client: This would be the application which is going to request the protected resources. It could be a REST Client or the POSTMAN app etc.
  4. Authorization server: This server is responsible for creating and issuing the access tokens to the client.

Also, at this stage its better to know the two different types of tokens:

  1. Access Tokens: These are the actual tokens which are sent with every requests as part of authentication and to access the protected resources.
  2. Refresh Tokens: These tokens are used to generate the access tokens. They are conventionally longer living and are used to generate the access tokens once they have expired without providing the credentials again.

Now, OAuth2.0 defines 4 grant types. They are the policies by which client and the auth server interact and exchange information.

  • Authorisation code – redirection-based flow for confidential client, the client communicates with the server via user-agent (web browser etc.), typical for web servers
  • Implicit – typically used with public clients running in a web browser using a scripting language, does not contain refresh tokens, this grant does not contain authentication and relies on redirection URI specified during client registration to the auth server
  • Resource owner password credentials – used with trusted clients (e.g. clients written by the same company that owns the auth server), user credentials are passed to the client and then to the auth server and exchanged for access and refresh tokens
  • Client credentials – used when the client itself is the resource owner (one client does not operate with multiple users), client credentials are exchanged directly for the tokens

In the next part, we will start with implementing the secure API using OAuth2.0. And click here for the previous post in the series.

Issues faced during API Development

I faced two issues which I am documenting here:

1st Issue

SEVERE: Mapped exception to response: 500 (Internal Server Error)

javax.ws.rs.WebApplicationException: com.sun.jersey.api.MessageException: A message body writer for Java class java.util.ArrayList, and Java type java.util.List<com.model.Quotes>, and MIME media type application/xml was not found.

at com.sun.jersey.spi.container.ContainerResponse.write(ContainerResponse.java:284)

at com.sun.jersey.server.impl.application.WebApplicationImpl._handleRequest(WebApplicationImpl.java:1510)

at com.sun.jersey.server.impl.application.WebApplicationImpl.handleRequest(WebApplicationImpl.java:1419)

at com.sun.jersey.server.impl.application.WebApplicationImpl.handleRequest(WebApplicationImpl.java:1409)

This was because I was trying to convert the response into XML, but Jersey wasn’t able to create xml tags.

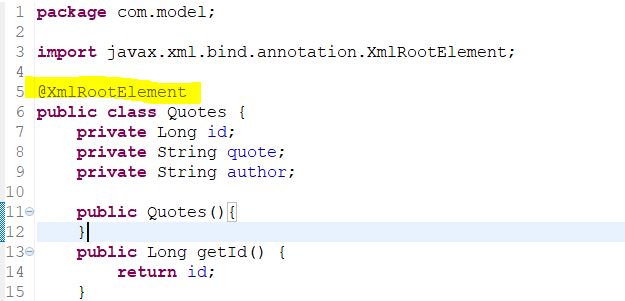
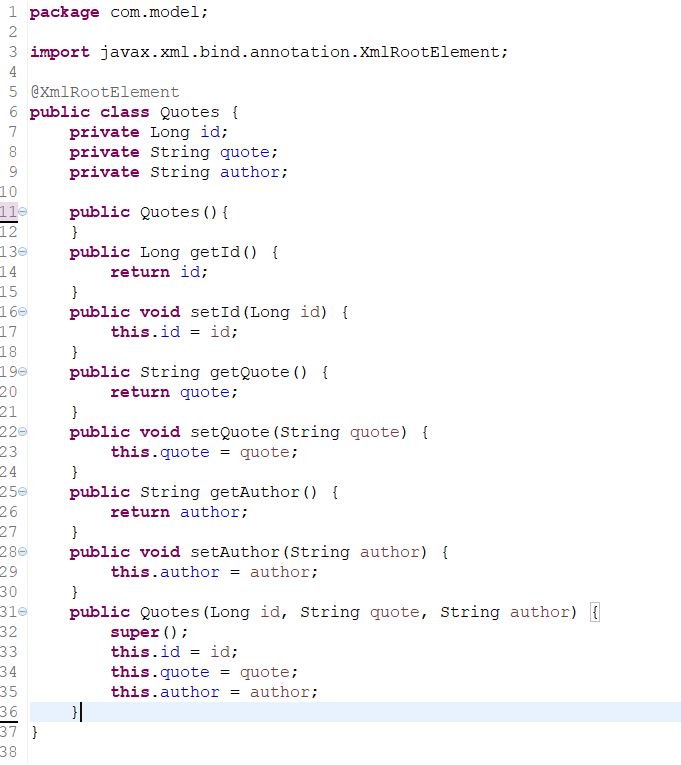
So, here you have to add an annotation called ‘@XmlRootElement’ in the model class. Using this annotation, will notify Jersey to make the xml elements from this class.

RESTAPI16

2nd Issue

SEVERE: Mapped exception to response: 500 (Internal Server Error)

javax.ws.rs.WebApplicationException: com.sun.xml.internal.bind.v2.runtime.IllegalAnnotationsException: 1 counts of IllegalAnnotationExceptions

com.model.Quotes does not have a no-arg default constructor.

this problem is related to the following location:

at com.model.Quotes

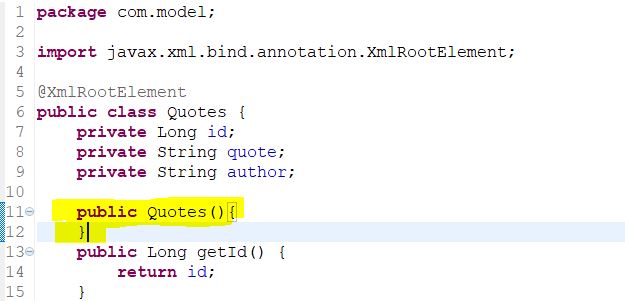
This is fairly simple. You need to add a no-argument constructor in the model class. I need to research it as to why this is necessary. I will add the same once I have finished researching.

RESTAPI17

Click here for the next article in the series(We will be talking about securing our API using OAuth2.0 security). And click here for the previous post.

Creating HTTP Methods

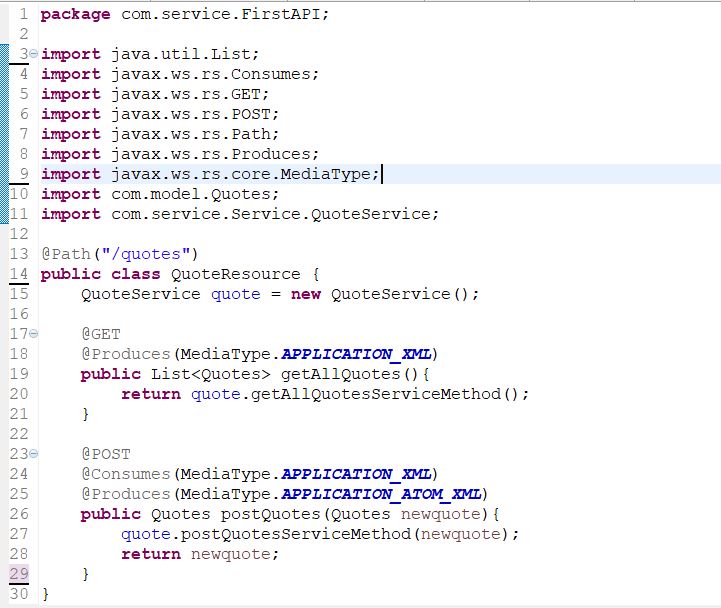
Continuing from last piece, in here we will create HTTP methods so that our API can serve GET, POST, UPDATE, DELETE requests.

Now, dynamic requests are best served using Database. Here, we won’t be connecting to an actual database(because that’s a different topic), but we would mock a database structure using Maps and in-memory database.

I faced two issues here, which documenting for future reference here.

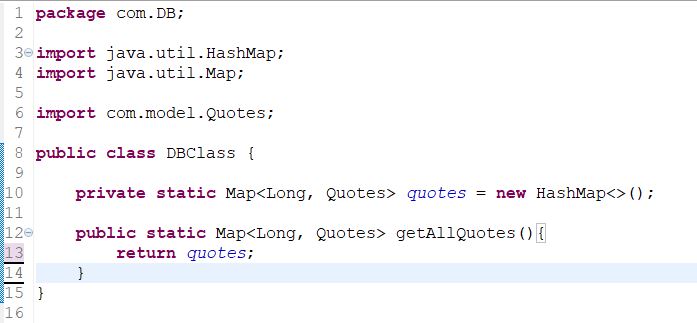
So,we would be making a class called DBClass.

RESTAPI9

RESTAPI11RESTAPI12

Now, lets test our HTTP Methods in POSTMAN.

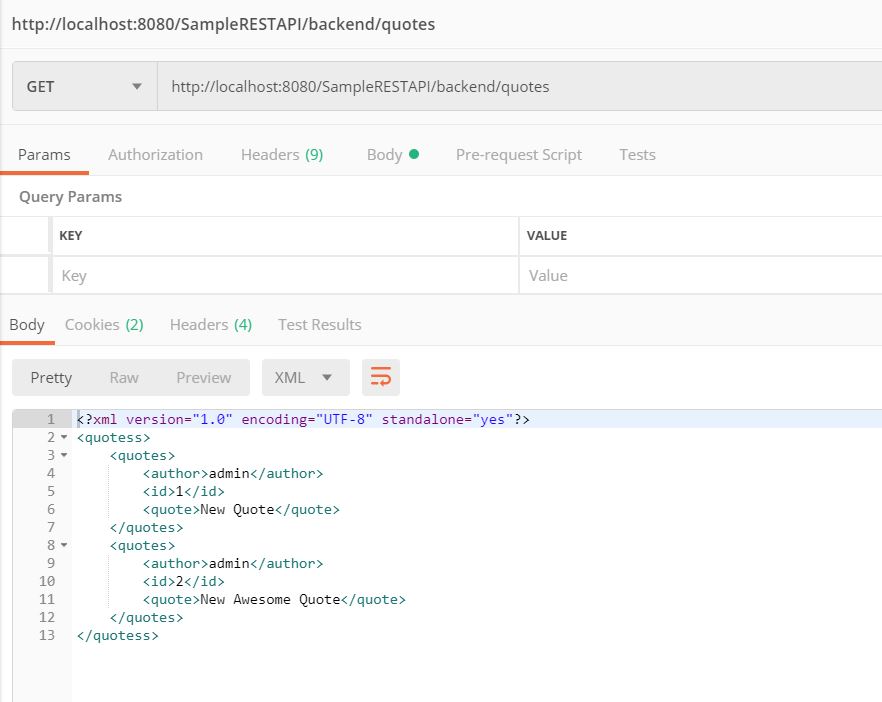
GET Method:

RESTAPI13

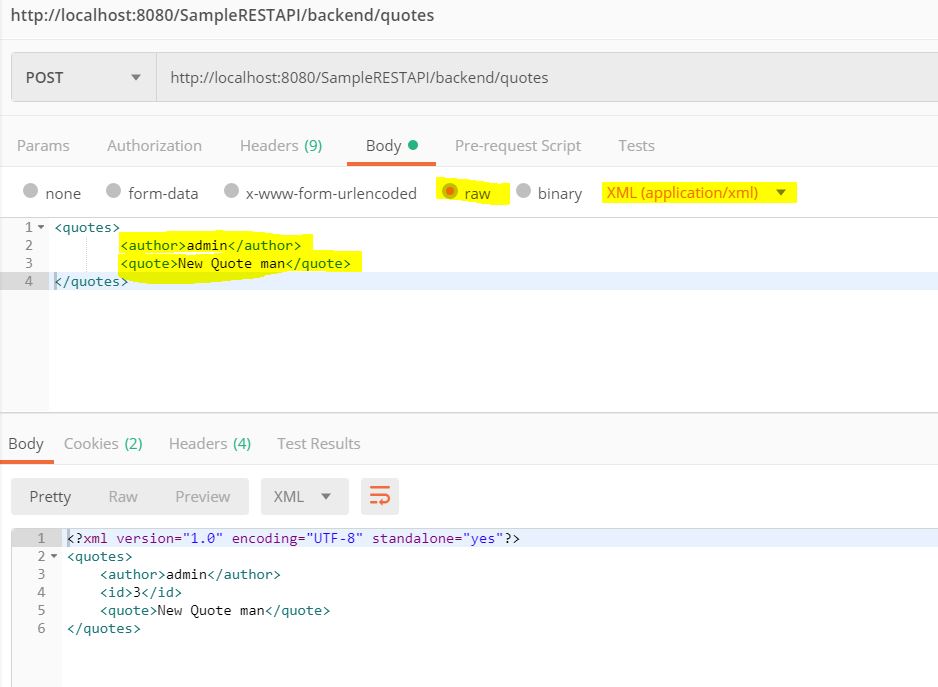
POST Method:

RESTAPI14

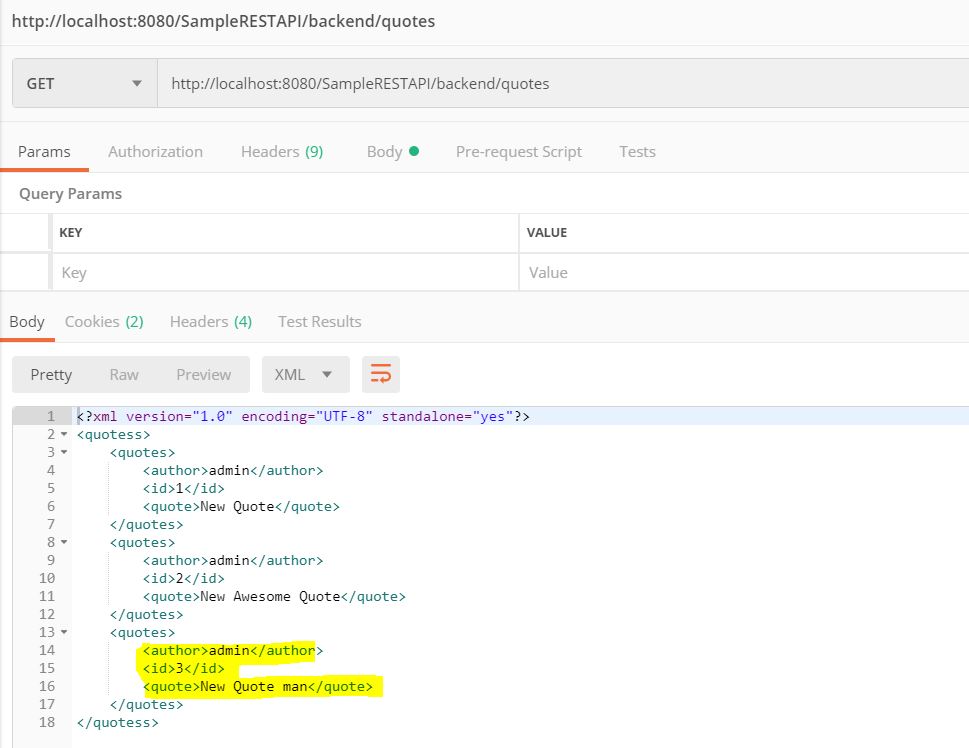
Now, lets do another GET Method to check if our new quote has been added or not:

RESTAPI15

The GitHub repo can be found here.

Click here for the next article in the series. It lists the issues that I faced during the development. And click here for the previous post.

Creating REST API(unsecured)

Hello Friends,

Today we will be making a REST API from scratch. Do remember that this API is unsecured, as in anybody with the connection to your network and the documentation of your API can access and make calls. You can ofcourse add authentication using OAuth2.0 to your API, but we will be doing it the next part of the series. Here, the focus would be to implement the different endpoints, so you can visualise the theory that you have learnt in the previous parts. We will be plugging the authentication part in the next article of the series.

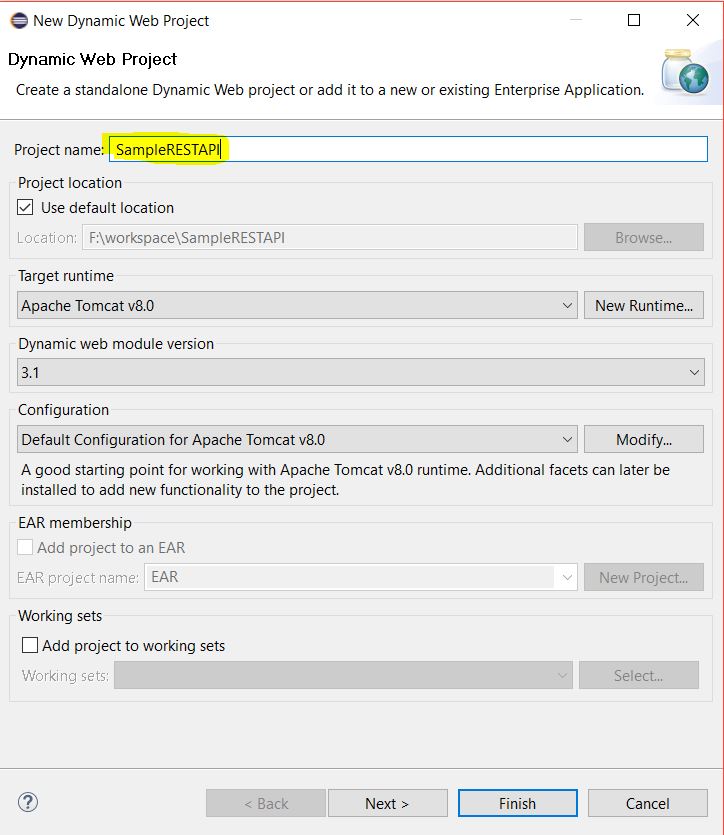
You need to get into Eclipse and create a new Dynamic Web Project. Name it whatever you want and click on Next.

RESTAPI1

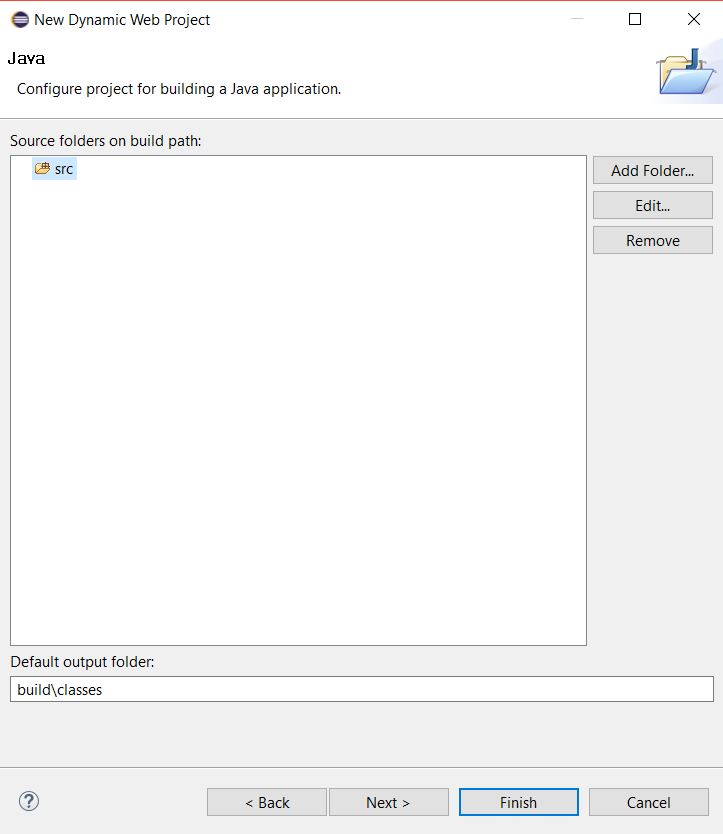
We will keep the defaults in the next window:

RESTAPI2

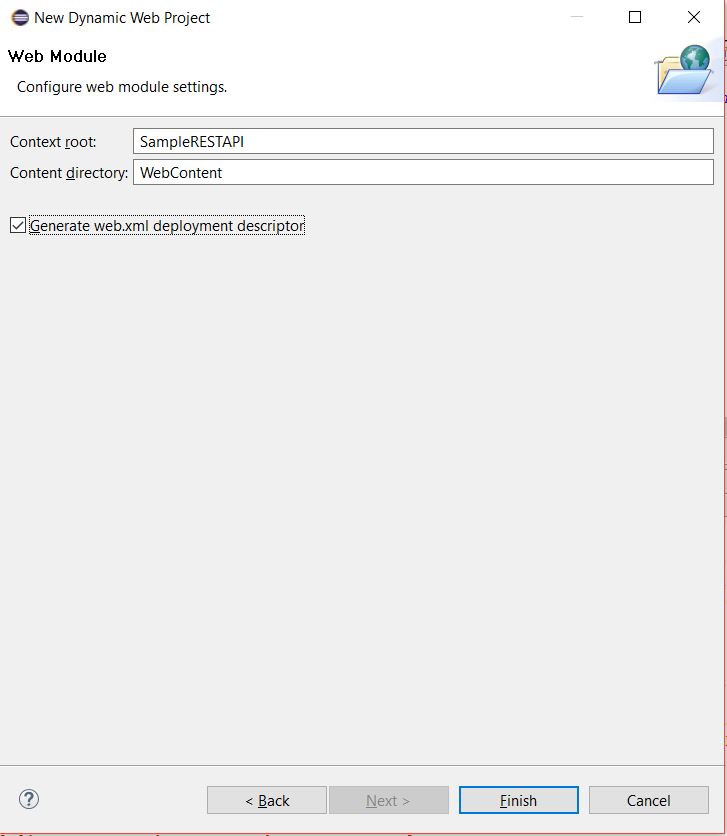
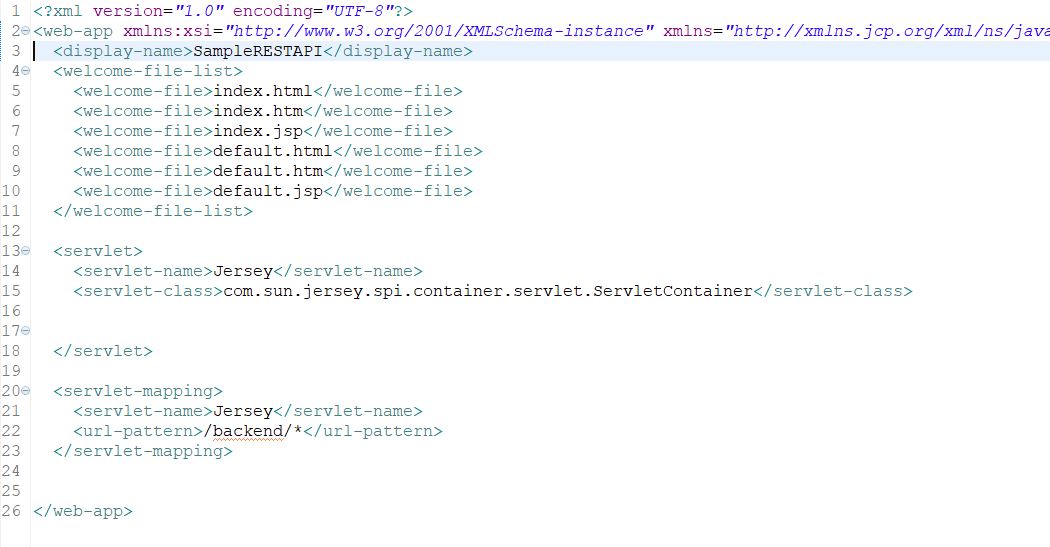
We will check the web.xml checkbox and click on Finish:

RESTAPI3

Adding Jersey library files

Go to https://jersey.github.io/download.html

And download the zip file for JAX-RS 1.1/Jersey 1.x. Essentially we are using Jersey 1.x in our project.

Once the zip is downloaded, copy all the files from the lib folder to the ‘lib’ folder of your project.

Continuing development

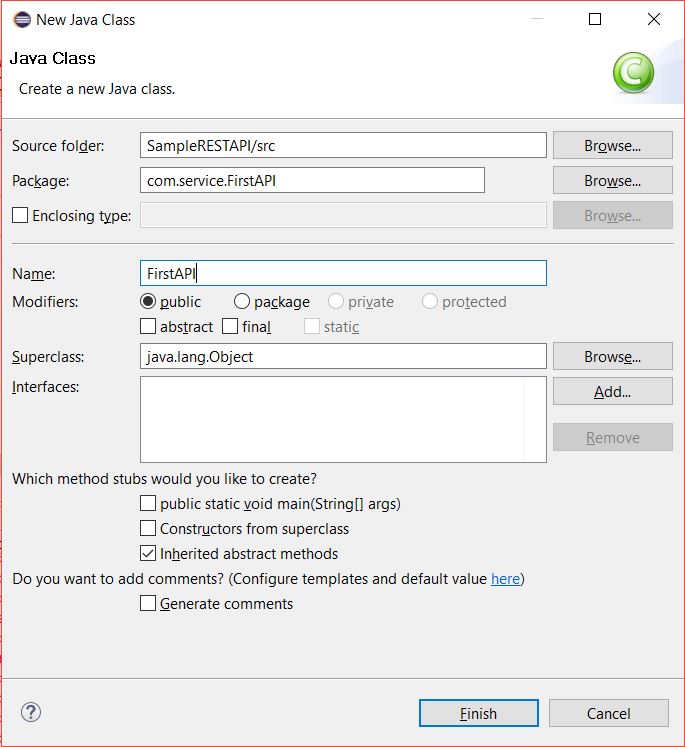
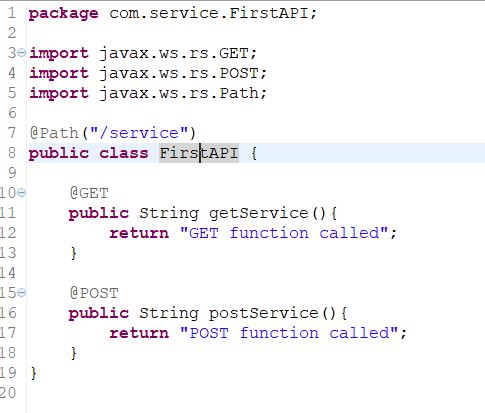
Now once we have added the dependencies from the jersey website. We will create our first class that will act as our API.

RESTAPI4

Put the following code in the class file:

RESTAPI5

RESTAPI6

RESTAPI7

RESTAPI8

Now this was all basic boilerplate stuff, lets make our own API’s which does dynamic stuff according to our requirement.

The GitHub repo can be found here.

Click here for next article in the series. And click here for the previous post.

What is an API? What is REST?

Hello Friends,

Here I am starting a series of articles, trying to explain everything I learnt about API and my journey foraying into the world of API and its best practices.

These articles will cover theoretical concepts, best practices, security aspects and a guide to build them APIs.

Okay lets start with, What is an API.

API stands for Application Programming Interface. Its a service offered by a company, website or API developers to interact with their data programmatically. By programmatically, I mean using some piece of code and not using the browser. So, a company may offer their data to clients in two ways, one using a website which has UI elements and can be seen through the browsers. The second way is through APIs. So, the client has to write some code to consume the offered APIs and the response is received in a XML, JSON or maybe plain text depending upon the requirements.

Now lets talk about REST.

We will first talk about a model developed by Leonard Richardson, to kind of give us a level that an API can score on its model on being less or more RESTful.

The Richardson model has 4 levels.

Level 0 – Not RESTful at all.

This level is the lowest of all, and the APIs belonging to this category are not RESTful at all. Examples are SOAP webservices. In a SOAP webservice, there is just one URI that is provided and the different functionalities are performed using actions provided in the XML body that is fed to the APIs.

So, a request to create or delete a resource will be sent to the same URI, but the actions to be performed will be provided in the request body.

Level 1 – In this case, if one is designing an API that can serves different resources using different contexts, that API would be called level 1 RESTful according to this model. Example, if you are providing {URI}/user to serve all requests related to users and {URI}/countries to serve requests related to countries, then that API attains level 1 score.

Level 2 – In this case, an API uses different HTTP Methods(like GET, POST, PUT, DELETE) to execute different requests. So, if a GET request is sent to {URI}/user, it will fetch user details, if a POST request is sent to the same URI, it will create a new user and so on.
Also, the API at this level should implement correct status codes in their reponses.

Level 3 – These kind of APIs use a concept called HATEOAS. It means that the response of the API contains the URL of related APIs that a client may be interested in.

My recommendation is to achieve level 2 of this model and your API would be a good enough.

REST is a style of architecture, acting like a guideline that the API developers can follow to make their API better.

Now lets get into practice mode and develop some APIs.

Click here for next article in the series.